Unity3D
===============================================
JDK
download / Java SE
Accept License Agreement 라디오 버튼 클릭 후
윈도우 os 에 맞는 것 다운로드, 설치
제어판 / 시스템 / 고급 시스템 설정 -> 고급 탭/ 환경 변수
밑의 시스템 변수 항목의 새로 만들기
변수 이름 : JAVA_HOME
변수 값: C:\Program Files\Java\jdk1.8.0_111 ( 실제 설치된 경로 확인 해보고 해라 )
기존에 존재하는 변수 Path 선택 후 편집 버튼
%JAVA_HOME%\bin 을 추가해 준다
윈도우+R / cmd / javac -version 의 결과가 javac 1.8.0_111 같이 설치한 jdk의 버전과
맞다면 오케이
unity / edit/ preferences/ external tools / jdk , browes 버튼으로 경로 찾기
예) C:/Program Files/Java/jdk1.8.0_111
※ 오류가 뜬다면
JAVA_HOME 등록과 Path 변경이 확실히 되었는지 재차 확인해라
설정이 변했다면 커맨드창을 새로 열어라!!
===============================================
ADK(android studio 설치)
download android studio
안드로이드 스튜디오 설치 시 sdk 자동 다운로드됨
경로를 바꾸고 싶다면
tool / sdk manager 에서 sdk 경로를 설정
최신 sdk의 경우 유니티에서 쓰는 파일을 누락한 경우 있음
tools 다운로드
다운받아 기존의 tools를 대체한다.
본인의 sdk 설치 경로
D:Android\sdk
안드로이드 실행, 프로젝트 생성창에서 밑에 보이는 configure/ settings
system settins/ android sdk
sdk 경로 변경(D:Android\sdk)
unity / edit/ preferences/ external tools / sdk , browes 버튼으로 경로 찾기
예) D:Android\sdk
background 테마 변경
File -> Settings -> Appearance (오른편, Theme: Darcula)
===============================================
Eclipse
Eclipse
eclipse-inst-win64.exe 다운로드,
Eclipse IDE for Java EE Developers 설치
help -> install new software
Add 버튼
Name: ADT(Android Development Tool)
Location: http://dl-ssl.google.com/android/eclipse/
select all 하고 넥스트,
설치를 계속해서 쭉쭉쭉 이어나가서 eclips가 재시작 되도록 까지 한다.
adroid sdk 설정
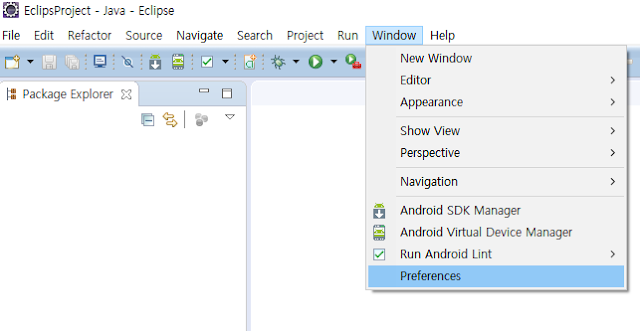
window -> preferences
열린 창에서 왼쪽 android / 오른쪽에서 미리 준비된 android sdk 경로 찾기
보다 자세한 설정은 아래 페이지로
이클립스 설정 포스트
===============================================
OpenSSL
http://slproweb.com/products/Win32OpenSSL.html 에서
Win64 OpenSSL v1.0.2j 을 다운로드
C 드라이브에 설치
(사용법)
C:\Users\bki\.android 에 debug.keystore 파일 존재
keytool -exportcert -alias androiddebugkey -keystore C:\Users\bki\.android\debug.keystore | C:\OpenSSL\bin\openssl sha1 -binary | C:\OpenSSL\bin\openssl base64
(릴리즈 키 만들었을 경우)
C:\Users\bki\.android 에 TestReleaseKey 파일 존재
C:\OpenSSL\bin\openssl 에 오픈ssl 존재
윈도우키+r을 누르고 cmd 실행
keytool -exportcert -alias TestReleaseKey -keystore C:\Users\bki\.android\TestReleaseKey | C:\OpenSSL\bin\openssl sha1 -binary | C:\OpenSSL\bin\openssl base64
===============================================
Filezilar
설치후 제어판의 프로그램 제거에서 lavasoft 있으면 제거
(unity startup crash의 원인)
===============================================
Visual Studio
테마 색상 변경
Tools ->Options -> Environment -> General
Right side, Color theme -> drop down select Dark
2016년 8월 29일 월요일
eclips unity 연동 (plugin 만들기)
1 단계
2 단계
3 단계
일단 유니티 프로젝트가 기본이다. 만들거나 열자
그리고 이클립스 파일(안드로이드파일)로 export
이클립스에서 임포트로 연다음
위 링크 내용대로 진행한다.
생 프로젝트로 시작하게되면 2단계가 진행되지 않는다. 반드시 유니티 프로젝트를
만들어서 엑스포트 한 후 그걸로 작업을 시작하자
위 링크 내용대로 진행한다.
생 프로젝트로 시작하게되면 2단계가 진행되지 않는다. 반드시 유니티 프로젝트를
만들어서 엑스포트 한 후 그걸로 작업을 시작하자
jar 파일 말고 res와 androidmenifest.xml은 merge 과정이 필요한데 별거 없다.
3단계 링크를 보고 참고한다. 결국 merge 라는 것은 중복된건 놔두고 없는걸 껴넣어주는
것이다.
내가 만든 프로젝트의 jar 파일이 다른 프로젝트를 라이브러리로 참고하고 있다면 그 대상이 되는 프로젝트의 jar파일도 unity로 복사해줘야 한다.
3단계 링크를 보고 참고한다. 결국 merge 라는 것은 중복된건 놔두고 없는걸 껴넣어주는
것이다.
내가 만든 프로젝트의 jar 파일이 다른 프로젝트를 라이브러리로 참고하고 있다면 그 대상이 되는 프로젝트의 jar파일도 unity로 복사해줘야 한다.
2016년 8월 18일 목요일
Eclips 설치 세팅
1.<설치>
2.안드로이드 플러그인 설치

install new software 선택 후

Add 버튼 누르면 새로운 저장소를 등록할수 있다.
우리가 데이터를 받아올 저장소 이름과 url를 입력한다.
ADT(Android Development Tool)
http://dl-ssl.google.com/android/eclipse/

OK 누르면 아래와 같은 화면이 나오고 select all 하고 다음으로 넘어감

설치를 계속해서 쭉쭉쭉 이어나가서 eclips가 재시작 되도록 까지 한다.
이제 재 시작 되면 android sdk 를 찾으려고 할것이다.
eclips한테 끌려다니지 말고 직접 해보자
위 그림처럼 타고 들어가

sdk location 에 미리 설치해둔 adk의 경로를 지정해주고 Apply 버튼을 누르면
위 그림 처럼 사용가능한 버전들이 나온다. OK
아래 그림의 버튼을 이용해서 adk 매니저 화면을 연다.
(이 버튼이 없으면 window>perspective>customize perspective -> action set availability 탭의 Android SDK and AVD Manager 를 체크 해줘야 함)

필요한 부분이 자동으로 체크되니깐 install 버튼 클릭

설치되는데 시간이 많이 걸림 30분 이상
이제 안드로이드 가상 디바이스 AVD(이 부분은 제대로 작동하지 않아서 그냥 실물 디바이스 이용)

아래와 같이 가상 장치를 만들어준다

만들어진 것을 확인 했다면 나간다.

아패 버튼을 클릭해서 안드로이드 프로젝트를 만들어 보도록하자


다음 다음 next next 한동안 프로젝트를 생성하게 된다.
프로젝트가 생성 되면 이 버튼으로 실행을 시킨다.


이렇게 실행 시킨다.(실행 시킬떄 좌측 Package Explorer에서 프로젝트(예의 경우 test)를 잡고 실행
2.안드로이드 플러그인 설치

install new software 선택 후

Add 버튼 누르면 새로운 저장소를 등록할수 있다.
우리가 데이터를 받아올 저장소 이름과 url를 입력한다.
ADT(Android Development Tool)
http://dl-ssl.google.com/android/eclipse/

OK 누르면 아래와 같은 화면이 나오고 select all 하고 다음으로 넘어감

설치를 계속해서 쭉쭉쭉 이어나가서 eclips가 재시작 되도록 까지 한다.
이제 재 시작 되면 android sdk 를 찾으려고 할것이다.
eclips한테 끌려다니지 말고 직접 해보자

위 그림처럼 타고 들어가

sdk location 에 미리 설치해둔 adk의 경로를 지정해주고 Apply 버튼을 누르면
위 그림 처럼 사용가능한 버전들이 나온다. OK
아래 그림의 버튼을 이용해서 adk 매니저 화면을 연다.
(이 버튼이 없으면 window>perspective>customize perspective -> action set availability 탭의 Android SDK and AVD Manager 를 체크 해줘야 함)

필요한 부분이 자동으로 체크되니깐 install 버튼 클릭

설치되는데 시간이 많이 걸림 30분 이상
이제 안드로이드 가상 디바이스 AVD(이 부분은 제대로 작동하지 않아서 그냥 실물 디바이스 이용)

아래와 같이 가상 장치를 만들어준다

만들어진 것을 확인 했다면 나간다.

아패 버튼을 클릭해서 안드로이드 프로젝트를 만들어 보도록하자


다음 다음 next next 한동안 프로젝트를 생성하게 된다.
프로젝트가 생성 되면 이 버튼으로 실행을 시킨다.


이렇게 실행 시킨다.(실행 시킬떄 좌측 Package Explorer에서 프로젝트(예의 경우 test)를 잡고 실행
2016년 8월 17일 수요일
2016년 8월 10일 수요일
kakao sdk 연동 (eclips)
kakao 개발자 등록이 선행되어야한다.
====================================================
OpenSSL 다운로드 및 설치 ( https://code.google.com/archive/p/openssl-for-windows/downloads )
 적당히 C:\OpenSSL 이런 간단한 경로에 압축해제(=설치)
조금 이따가 hash key를 얻기 위한 첫 단계임
====================================================
jdk 설치(이 단계는 설명 생략 검색해서 알아서 하자)
환경변수 세팅
unity는 자기가 알아서 찾는다. 하지만 android studio는 그렇지 않다.
정확한 세팅이 필요하다.
첫 번째.
제어판 > 시스템 > (좌측상측)고급 시스템 설정 > (아래쪽)환경변수(N)..
새로만들기 버튼이 두개 있는데 아래쪽 클릭
변수이름 : JAVA_HOME
변수값 : C:\Program Files\Java\jdk1.8.0_101 (버전 별로 실제 이름이 다름)
생성 돼었는지 확인후
같은 항목에 있는 path 변수 편집 버튼 클릭( 절대 위쪽 path를 말하는 것이 아님)
 아래처럼 %JAVA_HOME%\bin 을 새로만들어 줌
참고로 java home 변수에 bin 까지 포함 시키면 안드로이드 스튜디오에서 에러남

======================================================
kakao gamecenter 사이트에서 앱 등록 ( 무료일때만 developers 사이트 )

앱 만들어져 있었다... 앱 이름을 클릭하면 관리할 수 있는 탭들이 좌측에 생성

네이티브 키 가 앱키가 되는것이고
레스트 api 키는 레스트 api를 사용하는 데 필요한 키
어드민 키는 기술레벨에서는 쓸일이 없다.

안드로이드 해쉬키를 구해와서 이곳에 등록해 줘야 한다.
자 이제 안드로이드 해쉬키를 구하는 방법을 기록한다.
안드로이드 스튜디오를 설치했기 때문에 있을것이다. 설치 안했으면 없겠지(설치하자)
C:\Users\bki(사용자계정명)\.android 에 debug.keystore 라는 파일이 존재
C:\OpenSSL\bin\openssl 에 오픈ssl 존재
윈도우키+r을 누르고 cmd 실행
keytool -exportcert -alias androiddebugkey -keystore C:\Users\bki\.android\debug.keystore | C:\OpenSSL\bin\openssl sha1 -binary | C:\OpenSSL\bin\openssl base64
을 자기 상황에 맞게 입력후 실행하면 해시 키값이 구해진다.
이것이 원형이라면 원형
keytool -exportcert -alias androiddebugkey -keystore <debug.keystore위치> | <openssl 위치> sha1 -binary | <openssl 위치> base64

1qVRV0cIZ7PiMadowqcSjQ+h2TE=
그러나 이것은 debug 용
우리는 release용 또한 필요하다.
참고 사이트 : https://developer.android.com/studio/publish/app-signing.html
릴리즈용 key는 미리 마련되어 있지 않기 때문에 생성해줘야 한다.
안드로이드 스튜디어로 간다. 위쪽에 배치된 메뉴에서 build를 선택
generate signed apk를 선택한다.


미리 만들어 둔 것이 있다면 choose existing 이겠지만 그렇지 않기에 create new

이정도로 입력후 확인 다음다음 빌드까지 해보자
일단 이 단계에서 빌드를 안해도 키는 생성 되는것으로 판단된다.
릴리즈 키 해시 구해보자
C:\Users\bki\.android 에 TestReleaseKey 파일 존재
C:\OpenSSL\bin\openssl 에 오픈ssl 존재
윈도우키+r을 누르고 cmd 실행
keytool -exportcert -alias TestReleaseKey -keystore C:\Users\bki\.android\TestReleaseKey | C:\OpenSSL\bin\openssl sha1 -binary | C:\OpenSSL\bin\openssl base64
역시 자신의 상황에 맞춰서 파일 경로는 바꿔줘야 한다.
r0lIUCzrORgTiRiRgvuhyO/k4S4=
이 키는 다음에 릴리즈 할때 사용하자
======================================================
EclipsProject에 kakao sdk import
우선 프로젝트 설정을 바꿔줌

General > Workspace > Text file encoding 값을 UTF-8로 변경합니다
project를 import 해봅시다
위에서 보이는 것 처럼 현재 kakao sdk 와 unity project 둘다 import 된 상태이다.
kakao sdk는 library로 설정 해줘야 한다.(되어 있음)


이렇게 체크가 되어있다. 되어있어도 어디서 설정하는지 알고 넘어가자
반대로 주체가 되어 타 library를 이용하고 싶다면


import 된 것들 중에서 is library 체크된 것들이 뜨는 듯 하고 선택하여 추가 되면
이후에는 안뜨는걸 보니 똑띠네!

이렇게 추가된 모습을 볼 수 있음
이제 프로젝트에 앱키를 등록해보자
여기서의 앱키는 네이티브 앱키를 말 하는 것이며 카카오 사이트에서 앱 생성시 발급된다
프로젝트의 res/ values 에 kakao_string.xml 을 만들어보자
아래와 같이 기록한다.
AndroidManifest.xml 파일을 찾아 아래와 같은 위치에 같은 내용을 추가해 넣는다.
넣는 과정에서
필요한 activity 가 생긴다.
샘플을 보고 src와 gen 의 필요한 activity를 카피하고 오류 안나게 수정해준다.
( 카피작업들
- 카톡 샘플의 src / com.kakao.game.sample.common 아래 activity들을 복붙.
- 카톡 샘플의 gen / com.kakao.game.sample 아래 R.java를 복붙.
- android:debuggable="false" 이부분이 문제가 되면 그냥 지운다.
- import com.android.volley 같은 안드로이드 sdk 오류의 경우, 샘플의 lib 폴더에 있는
volley.jar 파일을 복사해 온다.
<<<<<여기부터 수정>>>>>
로그인 기능 등과 같이 카톡 sdk 기능을 이용하기 위해서는
<사용자 관리 설정>을 해주어야 한다.
이걸 안하면 아무리 구현해봐야 로그인 시도시 사용자 관리 설정을 해야 한다고 오류창만 나온다.

상단 중간쯤, 카카오 계정 로그인 하고 작은 글씨로 <사용자관리> 가 있다. 클릭!!!

중간에, 사용 OFF 로 된것을 On으로 바꾼다.
그리고 개인정보 관리 항목 정도만 수집목적을 입력하고 다른건 일단 사용 안함
하고 수정을 완료한다.
======================================================
unity 프로젝트에 카톡 sdk 연동과 로그인
이제부터는 새로운 프로젝트를 만들고 카톡 로그인을 적용시켜 보겠다.
unity project를 만든다( 카톡 개발자 사이트에 등록한 패키지 명으로)
이름은 카톡 개발자 사이트에 등록한 앱과 이름이 같도록 한다. 패키지명까지 같도록 한다. com.회사명.프로젝트명 (사실 꼭 같아야 하는지는 모르겠다, 안드로이드에서 프로젝트 생성시 회사명 앞에 사용자 명도 들어가는데 말이다.)
build settings : 안드로이드, 번들 com.회사명.프로젝트명 --> export
이름은 카톡 개발자 사이트에 등록한 앱과 이름이 같도록 한다. 패키지명까지 같도록 한다. com.회사명.프로젝트명 (사실 꼭 같아야 하는지는 모르겠다, 안드로이드에서 프로젝트 생성시 회사명 앞에 사용자 명도 들어가는데 말이다.)
export 된 폴더를 안드로이드 스튜디오를 이용해서 import project 한다.
Gradle 설정
아래 이미지에서 선택된 것이 그래이들이다.

allprojects 안에
keytool -exportcert -alias androiddebugkey -keystore <debug_keystore_path> -storepass android -keypass android | openssl sha1 -binary | openssl base64
다른 gradle에서 가져다 쓰기 위해 다음을 /gradle.properties 에 정의한다.
원문의 경우 버전이 1.0.40이었지만 현재 최신 버전은 50이다. 각자 현재의 최신 버전을 적어주도록 하자.
KAKAO_SDK_GROUP=com.kakao.sdk
KAKAO_SDK_VERSION=1.1.20
=====================================================
// 코드레벨 android 버전 문제 4.4.2가 안되는 문제
java.lang.NoSuchMethodError: android.content.res.Resources.getDrawable
package com.kakao.auth.authorization.authcode;
이 패키지의 KakaoWebViewDialog 스크립트의
private void createCrossImage() 메소드 내용을
Drawable crossDrawable = getContext().getResources().getDrawable(id, null);//"bk" 수정
에서
Drawable crossDrawable;
if(android.os.Build.VERSION.SDK_INT >= 21) {
crossDrawable = getContext().getResources().getDrawable(id, null);
}
else {
crossDrawable = getContext().getResources().getDrawable(id);
}
로 변경한다.
=====================================================
// 코드레벨 android 버전 문제 4.4.2가 안되는 문제
java.lang.UnsatisfiedLinkError: Native method not found: com.unity3d.player.UnityPlayer.UnitySendMessage:(Ljava/lang/String;Ljava/lang/String;Ljava/lang/String;)V
====================================================
OpenSSL 다운로드 및 설치 ( https://code.google.com/archive/p/openssl-for-windows/downloads )

조금 이따가 hash key를 얻기 위한 첫 단계임
====================================================
jdk 설치(이 단계는 설명 생략 검색해서 알아서 하자)
환경변수 세팅
unity는 자기가 알아서 찾는다. 하지만 android studio는 그렇지 않다.
정확한 세팅이 필요하다.
첫 번째.
제어판 > 시스템 > (좌측상측)고급 시스템 설정 > (아래쪽)환경변수(N)..
새로만들기 버튼이 두개 있는데 아래쪽 클릭
변수이름 : JAVA_HOME
변수값 : C:\Program Files\Java\jdk1.8.0_101 (버전 별로 실제 이름이 다름)
생성 돼었는지 확인후
같은 항목에 있는 path 변수 편집 버튼 클릭( 절대 위쪽 path를 말하는 것이 아님)

참고로 java home 변수에 bin 까지 포함 시키면 안드로이드 스튜디오에서 에러남

======================================================
kakao gamecenter 사이트에서 앱 등록 ( 무료일때만 developers 사이트 )

앱 만들어져 있었다... 앱 이름을 클릭하면 관리할 수 있는 탭들이 좌측에 생성

네이티브 키 가 앱키가 되는것이고
레스트 api 키는 레스트 api를 사용하는 데 필요한 키
어드민 키는 기술레벨에서는 쓸일이 없다.

안드로이드 해쉬키를 구해와서 이곳에 등록해 줘야 한다.
자 이제 안드로이드 해쉬키를 구하는 방법을 기록한다.
안드로이드 스튜디오를 설치했기 때문에 있을것이다. 설치 안했으면 없겠지(설치하자)
C:\Users\bki(사용자계정명)\.android 에 debug.keystore 라는 파일이 존재
C:\OpenSSL\bin\openssl 에 오픈ssl 존재
윈도우키+r을 누르고 cmd 실행
keytool -exportcert -alias androiddebugkey -keystore C:\Users\bki\.android\debug.keystore | C:\OpenSSL\bin\openssl sha1 -binary | C:\OpenSSL\bin\openssl base64
을 자기 상황에 맞게 입력후 실행하면 해시 키값이 구해진다.
이것이 원형이라면 원형
keytool -exportcert -alias androiddebugkey -keystore <debug.keystore위치> | <openssl 위치> sha1 -binary | <openssl 위치> base64

1qVRV0cIZ7PiMadowqcSjQ+h2TE=
그러나 이것은 debug 용
우리는 release용 또한 필요하다.
참고 사이트 : https://developer.android.com/studio/publish/app-signing.html
릴리즈용 key는 미리 마련되어 있지 않기 때문에 생성해줘야 한다.
안드로이드 스튜디어로 간다. 위쪽에 배치된 메뉴에서 build를 선택
generate signed apk를 선택한다.


미리 만들어 둔 것이 있다면 choose existing 이겠지만 그렇지 않기에 create new

이정도로 입력후 확인 다음다음 빌드까지 해보자
일단 이 단계에서 빌드를 안해도 키는 생성 되는것으로 판단된다.
릴리즈 키 해시 구해보자
C:\Users\bki\.android 에 TestReleaseKey 파일 존재
C:\OpenSSL\bin\openssl 에 오픈ssl 존재
윈도우키+r을 누르고 cmd 실행
keytool -exportcert -alias TestReleaseKey -keystore C:\Users\bki\.android\TestReleaseKey | C:\OpenSSL\bin\openssl sha1 -binary | C:\OpenSSL\bin\openssl base64
역시 자신의 상황에 맞춰서 파일 경로는 바꿔줘야 한다.
r0lIUCzrORgTiRiRgvuhyO/k4S4=
이 키는 다음에 릴리즈 할때 사용하자
======================================================
EclipsProject에 kakao sdk import
우선 프로젝트 설정을 바꿔줌

General > Workspace > Text file encoding 값을 UTF-8로 변경합니다

project를 import 해봅시다
위에서 보이는 것 처럼 현재 kakao sdk 와 unity project 둘다 import 된 상태이다.
kakao sdk는 library로 설정 해줘야 한다.(되어 있음)


이렇게 체크가 되어있다. 되어있어도 어디서 설정하는지 알고 넘어가자
반대로 주체가 되어 타 library를 이용하고 싶다면


import 된 것들 중에서 is library 체크된 것들이 뜨는 듯 하고 선택하여 추가 되면
이후에는 안뜨는걸 보니 똑띠네!

이렇게 추가된 모습을 볼 수 있음
이제 프로젝트에 앱키를 등록해보자
여기서의 앱키는 네이티브 앱키를 말 하는 것이며 카카오 사이트에서 앱 생성시 발급된다
프로젝트의 res/ values 에 kakao_string.xml 을 만들어보자
아래와 같이 기록한다.
<resources>
 <string name="kakao_app_key">a3212fd7d16a9f7edd239a69441f3446</string>
 <string name="kakao_scheme">kakaoa3212fd7d16a9f7edd239a69441f3446</string>

 <string name="kakaolink_host">kakaolink</string>
         <string name="kakaostory_host">kakaostory</string>
</resources>
AndroidManifest.xml 파일을 찾아 아래와 같은 위치에 같은 내용을 추가해 넣는다.
<!-- 1. 서버와의 통신을 위해 network 권한을 설정합니다. -->
<uses-permission android:name="android.permission.INTERNET" />
<!-- 이미지 캐싱을 위해 SD카드에의 접근 권한이 주어져야 합니다. -->
<uses-permission android:name="android.permission.WRITE_EXTERNAL_STORAGE" />
<uses-permission android:name="android.permission.READ_EXTERNAL_STORAGE" />

<application>
    <!-- 2. 로그인 버튼이 포함된 SampleLoginActivity를 등록합니다. -->
    <!-- 상속하여 사용하여도 되고 SampleLoginActivity에 있는 코드를 copy해 사용하셔도 됩니다. -->
    <activity
        ...
        android:name=".SampleLoginActivity">
        <intent-filter>
            <action android:name="android.intent.action.MAIN" />
            <category android:name="android.intent.category.LAUNCHER" />
        </intent-filter>
    </activity>
    ...
    <!-- 3. com.kakao.sdk.AppKey 이름으로 앱키를 등록합니다. -->
    <meta-data
        android:name="com.kakao.sdk.AppKey"
        android:value="@string/kakao_app_key" />
</application>
넣는 과정에서
필요한 activity 가 생긴다.
샘플을 보고 src와 gen 의 필요한 activity를 카피하고 오류 안나게 수정해준다.
( 카피작업들
- 카톡 샘플의 src / com.kakao.game.sample.common 아래 activity들을 복붙.
- 카톡 샘플의 gen / com.kakao.game.sample 아래 R.java를 복붙.
- android:debuggable="false" 이부분이 문제가 되면 그냥 지운다.
- import com.android.volley 같은 안드로이드 sdk 오류의 경우, 샘플의 lib 폴더에 있는
volley.jar 파일을 복사해 온다.
<<<<<여기부터 수정>>>>>
로그인 기능 등과 같이 카톡 sdk 기능을 이용하기 위해서는
<사용자 관리 설정>을 해주어야 한다.
이걸 안하면 아무리 구현해봐야 로그인 시도시 사용자 관리 설정을 해야 한다고 오류창만 나온다.

상단 중간쯤, 카카오 계정 로그인 하고 작은 글씨로 <사용자관리> 가 있다. 클릭!!!

중간에, 사용 OFF 로 된것을 On으로 바꾼다.
그리고 개인정보 관리 항목 정도만 수집목적을 입력하고 다른건 일단 사용 안함
하고 수정을 완료한다.
======================================================
unity 프로젝트에 카톡 sdk 연동과 로그인
이제부터는 새로운 프로젝트를 만들고 카톡 로그인을 적용시켜 보겠다.
unity project를 만든다( 카톡 개발자 사이트에 등록한 패키지 명으로)
이름은 카톡 개발자 사이트에 등록한 앱과 이름이 같도록 한다. 패키지명까지 같도록 한다. com.회사명.프로젝트명 (사실 꼭 같아야 하는지는 모르겠다, 안드로이드에서 프로젝트 생성시 회사명 앞에 사용자 명도 들어가는데 말이다.)
이름은 카톡 개발자 사이트에 등록한 앱과 이름이 같도록 한다. 패키지명까지 같도록 한다. com.회사명.프로젝트명 (사실 꼭 같아야 하는지는 모르겠다, 안드로이드에서 프로젝트 생성시 회사명 앞에 사용자 명도 들어가는데 말이다.)
export 된 폴더를 안드로이드 스튜디오를 이용해서 import project 한다.
Gradle 설정
아래 이미지에서 선택된 것이 그래이들이다.

allprojects 안에
allprojects {
    repositories {
        jcenter()
        mavenCentral()
        maven { url 'http://devrepo.kakao.com:8088/nexus/content/groups/public/' }
    }
}
이렇게 수정해 준다.keytool -exportcert -alias androiddebugkey -keystore <debug_keystore_path> -storepass android -keypass android | openssl sha1 -binary | openssl base64
다른 gradle에서 가져다 쓰기 위해 다음을 /gradle.properties 에 정의한다.
원문의 경우 버전이 1.0.40이었지만 현재 최신 버전은 50이다. 각자 현재의 최신 버전을 적어주도록 하자.
KAKAO_SDK_GROUP=com.kakao.sdk
KAKAO_SDK_VERSION=1.1.20
=====================================================
// 코드레벨 android 버전 문제 4.4.2가 안되는 문제
java.lang.NoSuchMethodError: android.content.res.Resources.getDrawable
package com.kakao.auth.authorization.authcode;
이 패키지의 KakaoWebViewDialog 스크립트의
private void createCrossImage() 메소드 내용을
Drawable crossDrawable = getContext().getResources().getDrawable(id, null);//"bk" 수정
에서
Drawable crossDrawable;
if(android.os.Build.VERSION.SDK_INT >= 21) {
crossDrawable = getContext().getResources().getDrawable(id, null);
}
else {
crossDrawable = getContext().getResources().getDrawable(id);
}
로 변경한다.
=====================================================
// 코드레벨 android 버전 문제 4.4.2가 안되는 문제
java.lang.UnsatisfiedLinkError: Native method not found: com.unity3d.player.UnityPlayer.UnitySendMessage:(Ljava/lang/String;Ljava/lang/String;Ljava/lang/String;)V
2016년 8월 4일 목요일
D3D trouble shooting
vs 2015 에서 string.h 를 못찾을때는 vs 2015 에서 인클루드 경로가 바뀌어서 그런것이다
Go to
Project->Properties->. In Configuraton Properties->VC++ Diretories->Library Directories add a path to C:\Program Files (x86)\Windows Kits\10\Lib\10.0.10150.0\ucrt\(Choose your architecture)
And in
C/C++->General->Additional include directories add a path to:C:\Program Files (x86)\Windows Kits\10\Include\10.0.10150.0\ucrt
Note: The 10.0.10150.0 may vary depending on your version.
================================================================
2016년 7월 12일 화요일
Unity Coroutine
애니메이션이 특정 부분 완료되기까지를 기다리는 코루틴의 예
출처
yield.
null - Update구문의 수행이 완료될 때까지 대기한다.
WaitForEndOfFrame - 현재 프레임의 렌더링 작업이 끝날 때까지 대기한다.
WaitForFixedUpdate - FixedUpdate구문의 수행이 완료될 때까지 대기한다.
WaitForSeconds - 지정한 초만큼 대기한다.
WWW - 웹에서 데이터의 전송이 완료될 때까지 대기한다.
(WaitForSeconds or null처럼 재시작한다.)
Another coroutine - 새로운 코루틴은 yielder가 재시작되기 전에 완료 될 것이다.
//Wait for an animation to be a certain amount complete
IEnumerator WaitForAnimation(string name, float ratio, bool play)
{
//Get the animation state for the named animation
var anim = animation[name];
//Play the animation
if(play) animation.Play(name);
//Loop until the normalized time reports a value
//greater than our ratio. This method of waiting for
//an animation accounts for the speed fluctuating as the
//animation is played.
while(anim.normalizedTime + float.Epsilon + Time.deltaTime < ratio)
yield return new WaitForEndOfFrame();
}
애니메이션을 기다리는 코루틴을 다음과 같이 작성
IEnumerator Die()
{
//Wait for the die animation to be 50% complete
yield return StartCoroutine(WaitForAnimation("die",0.5f, true));
//Drop the enemies on dying pickup
DropPickupItem();
//Wait for the animation to complete
yield return StartCoroutine(WaitForAnimation("die",1f, false));
Destroy(gameObject);
}
2016년 7월 3일 일요일
unity / shader / 테이터 타입 및 정밀도
유니티 사이트
float : High precision
generally 32 bits, used for world space positions, texture coordinates, or scalar computations involving complex functions such as trigonometry(삼각법) or power(제곱)/exponentiation(지수).
half : Medium precision
generally 16 bits (range of –60000 to +60000, with about 3 decimal digits of precision).
useful for short vectors, directions, object space positions, high dynamic range colors
fixed : Low precision
generally 11 bits, with a range of –2.0 to +2.0 and 1/256th precision.
useful for regular colors (as typically stored in regular textures) and performing simple operations on them.
Integer data types
often used as loop counters or array indices. For this purpose, they generally work fine across various platforms.
Composite vector/matrix types
HLSL has built-in vector and matrix types that are created from the basic types. For example, float3 is a 3D vector with .x, .y, .z components, and half4 is a medium precision 4D vector with .x, .y, .z, .w components. Alternatively, vectors can be indexed using .r, .g, .b, .a components, which is useful when working on colors.
Texture/Sampler types
Typically you declare textures in your HLSL code as follows:
sampler2D _MainTex;
samplerCUBE _Cubemap;
For mobile platforms, these translate into “low precision samplers”, i.e. the textures are expected to have low precision data in them. If you know your texture contains HDR colors, you might want to use half precision sampler:
sampler2D_half _MainTex;
samplerCUBE_half _Cubemap;
Or if your texture contains full float precision data (e.g. depth texture), use a full precision sampler:
sampler2D_float _MainTex;
samplerCUBE_float _Cubemap;
2016년 7월 1일 금요일
Unity shader Built-in include files ( #include "UnityCG.cginc")
유니티 사이트
CGPROGRAM
// ...
#include "UnityCG.cginc" <---
// ...
ENDCG
Data structures in UnityCG.cginc
struct appdata_base: position, normal, one texture coordinate.
struct appdata_tan: position, normal, tangent, one texture coordinate.
struct appdata_full: position, normal, tangent, vertex color and two texture coordinates.
struct appdata_img: position and one texture coordinate.
Vertex transformation functions in UnityCG.cginc
- float4 UnityObjectToClipPos(float3 pos)
Transforms a point from object space to the camera’s clip space in homogeneous coordinates.
This is the equivalent of mul(UNITY_MATRIX_MVP, float4(pos, 1.0)),
and should be used in its place.
- float3 UnityObjectToViewPos(float3 pos)
Transforms a point from object space to view space.
This is the equivalent of mul(UNITY_MATRIX_MV, float4(pos, 1.0)).xyz,
and should be used in its place.
Generic helper functions in UnityCG.cginc
- float3 WorldSpaceViewDir (float4 v) : UnityWorldSpaceViewDir(worldPos)
Returns world space direction (not normalized) from given object space vertex position towards
the camera.
- float3 ObjSpaceViewDir (float4 v)
Returns object space direction (not normalized) from given object space vertex position towards
the camera.
- float2 ParallaxOffset (half h, half height, half3 viewDir)
calculates UV offset for parallax normal mapping.
- fixed Luminance (fixed3 c)
Converts color to luminance (grayscale).
- fixed3 DecodeLightmap (fixed4 color)
Decodes color from Unity lightmap (RGBM or dLDR depending on platform).
- float4 EncodeFloatRGBA (float v)
Encodes [0..1) range float into RGBA color, for storage in low precision render target.
- float DecodeFloatRGBA (float4 enc)
Decodes RGBA color into a float.
- float2 EncodeFloatRG (float v) Encodes [0..1)
range float into a float2.
- float DecodeFloatRG (float2 enc)
Decodes a previously-encoded RG float.
- float2 EncodeViewNormalStereo (float3 n)
Encodes view space normal into two numbers in 0..1 range.
- float3 DecodeViewNormalStereo (float4 enc4)
Decodes view space normal from enc4.xy.
-> 찾아봐야 할 것
- UnityObjectToWorldNormal(i.normal) : 노말을 월드 노말로
- UNITY_SAMPLE_TEXCUBE(unity_SpecCube0, i.worldRefl) : 디폴트 리플렉션 큐브맵을 뽑는다.
half4 skyData = UNITY_SAMPLE_TEXCUBE(unity_SpecCube0, i.worldRefl);
Forward rendering helper functions in UnityCG.cginc
These functions are only useful when using forward rendering
(ForwardBase or ForwardAdd pass types).
- float3 WorldSpaceLightDir (float4 v)
Computes world space direction (not normalized) to light, given object space vertex position.
- float3 ObjSpaceLightDir (float4 v)
Computes object space direction (not normalized) to light, given object space vertex position.
- float3 Shade4PointLights (...)
Computes illumination from four point lights, with light data tightly packed into vectors.
Forward rendering uses this to compute per-vertex lighting.
Vertex-lit helper functions in UnityCG.cginc
These functions are only useful when using per-vertex lit shaders (“Vertex” pass type).
- float3 ShadeVertexLights (float4 vertex, float3 normal)
Computes illumination from four per-vertex lights and ambient,
given object space position & normal.
=========================================================================================
Built-in shader variables
Transformations
All these matrices are float4x4 type.
UNITY_MATRIX_MVP Current model * view * projection matrix.
UNITY_MATRIX_MV Current model * view matrix.
UNITY_MATRIX_V Current view matrix.
UNITY_MATRIX_P Current projection matrix.
UNITY_MATRIX_VP Current view * projection matrix.
UNITY_MATRIX_T_MV Transpose of model * view matrix.
UNITY_MATRIX_IT_MV Inverse transpose of model * view matrix.
_Object2World Current model matrix. vertex와 곱하면 월드 스페이스의 포지션
float3 worldPosition = mul(_Object2World, v.vertex).xyz;
_World2Object Inverse of current world matrix.
Camera and screen
These variables will correspond to the Camera that is rendering.
For example during shadowmap rendering, they will still refer to the Camera component values,
and not the “virtual camera” that is used for the shadowmap projection.
- _WorldSpaceCameraPos : float3
World space position of the camera.
- _ProjectionParams :float4
x is 1.0 (or –1.0 if currently rendering with a flipped projection matrix),
y is the camera’s near plane,
z is the camera’s far plane and w is 1/FarPlane.
- _ScreenParams : float4
x is the camera’s render target width in pixels,
y is the camera’s render target height in pixels,
z is 1.0 + 1.0/width
w is 1.0 + 1.0/height.
- _ZBufferParams : float4 ( Used to linearize Z buffer values. )
x is (1-far/near),
y is (far/near),
z is (x/far),
w is (y/far).
- unity_OrthoParams : float4
x is orthographic camera’s width,
y is orthographic camera’s height,
z is unused
w is 1.0 when camera is orthographic, 0.0 when perspective.
- unity_CameraProjection : float4x4
Camera’s projection matrix.
- unity_CameraInvProjection : float4x4
Inverse of camera’s projection matrix.
- unity_CameraWorldClipPlanes[6] : float4
Camera frustum plane world space equations, in this order: left, right, bottom, top, near, far.
Time
- _Time : float4
Time since level load (t/20, t, t*2, t*3), use to animate things inside the shaders.
- _SinTime : float4
Sine of time: (t/8, t/4, t/2, t).
- _CosTime : float4
Cosine of time: (t/8, t/4, t/2, t).
- unity_DeltaTime : float4
Delta time: (dt, 1/dt, smoothDt, 1/smoothDt).
Lighting
Light parameters are passed to shaders in different ways
depending on which Rendering Path is used, and which LightMode Pass Tag is used in the shader.
Forward rendering (ForwardBase and ForwardAdd pass types):
_LightColor0 (declared in Lighting.cginc) : fixed4
Light color.
_WorldSpaceLightPos0 : float4
Directional lights: (world space direction, 0). Other lights: (world space position, 1).
_LightMatrix0 (declared in AutoLight.cginc) : float4x4
World-to-light matrix. Used to sample cookie & attenuation textures.
unity_4LightPosX0, unity_4LightPosY0, unity_4LightPosZ0 : float4 (ForwardBase pass only)
world space positions of first four non-important point lights.
unity_4LightAtten0 : float4 (ForwardBase pass only)
attenuation factors of first four non-important point lights.
unity_LightColor : half4[4] (ForwardBase pass only)
colors of of first four non-important point lights.
Deferred shading and deferred lighting, used in the lighting pass shader
(all declared in UnityDeferredLibrary.cginc):
_LightColor : float4
Light color.
_LightMatrix0 :float4x4
World-to-light matrix. Used to sample cookie & attenuation textures.
Fog and Ambient
unity_AmbientSky : fixed4
Sky ambient lighting color in gradient ambient lighting case.
unity_AmbientEquator : fixed4
Equator ambient lighting color in gradient ambient lighting case.
unity_AmbientGround : fixed4
Ground ambient lighting color in gradient ambient lighting case.
UNITY_LIGHTMODEL_AMBIENT : fixed4
Ambient lighting color (sky color in gradient ambient case). Legacy variable.
unity_FogColor : fixed4
Fog color.
unity_FogParams : float4
Parameters for fog calculation:(density/sqrt(ln(2)),density/ln(2),–1/(end-start),end/(end-start))
x is useful for Exp2 fog mode, y for Exp mode, z and w for Linear mode.
Ti
피드 구독하기:
글 (Atom)